Friday, August 5, 2011

Lemon Peppered Salmon with Quinoa Salad

This is one of my favorite meals! I absolutely LOVE lemon pepper and it pairs so beautifully with Salmon. If you have never worked with quinoa, it's super easy and very delicious! It's also very versatile!


Ingredients for baked salmon:


1 frozen salmon fillet, defrosted (we buy frozen salmon fillets at Costco, but a fresh fillet will work too.)
2 tbsp extra virgin olive oil
freshly ground lemon pepper (Trader Joe's has lemon pepper in a grinder for $1.99!)
1 lemon


But before you start baking your salmon, start cooking the quinoa. We'll chop our add-ins while the salmon is baking, but the quinoa needs some time to cook first.


Ingredients for quiona salad:


1/4 cup uncooked quinoa (I use the Organic Quinoa from Trader Joe's)
1/2 cup water (or some kind of broth like chicken or vegetable)
a small handful each of dried cranberries, fresh basil, and almonds.


Place the quinoa and the water in a small saucepan on the stove and bring to a boil. Once it's reached a boil, reduce to simmer and cook for 10-12 minutes or until all of the water is absorbed.

While the quinoa is cooking, prepare the salmon:
Start by making a "foil boat" for your salmon, and place in on a baking sheet. Drizzle one tablespoon of olive oil in the foil and spread in around, place the fillet in the foil and drizzle with he remaining olive oil. make sure your the top and bottom of the fillet is evenly coated with oil. Cover the fillet with lemon pepper; the oil will help it stick. Cut a few slices of the lemon and save the rest for squeezing on the salmon when its cooked. Arrange the lemon slices on the fillet and place it in the oven for about 25 minutes or until its flaky (and not raw looking :)


"Foil Boat" so the oil doesn't go anywhere.

Restaurant quality from your kitchen! 
 Here is my favorite lemon pepper from Trader Joe's!
On the right is what is in the grinder,
on the left is what comes out when you grind it. 
While the salmon is baking, chop all of the add-ins for the quinoa salad. Chop the almonds, dried cranberries and fresh basil into small pieces, ans set aside until the quinoa is cooked. Once the quinoa is ready, take it off the heat and add the almonds, cranberries and basil into the pot. the leftover heat will help infuse the quinoa with the rich flavors of the add-ins.


Let both the salmon and the salad sit for a couple of minutes before serving so both are not too hot. When you are ready to eat, poke holes in the salmon or break it apart with your fork and squeeze the rest of the lemon on top. A little bit of lemon tossed with the salad would be good too. YUM!


NOTE: You can really add anything you want to a quinoa salad! don't feel limited. Other options are: dried apricot, chopped apples, cinnamon, and any other nut or fresh herb. Play around with it and let me know what you create! :)

Wednesday, July 13, 2011

Easy, Healthy, Lettuce-less Salad

This is a super easy, very versatile salad that you can whip up in a few minutes. I really wanted some hearty bites with dinner the other night, and I always have these veggies on hand. You can use other veggies or add different ones (bell pepper, mushrooms, radishes...), but these were my go-to veggies that night.

Start by gathering these ingredients:

1/3 of a cucumber
1 tomato
1 avocado (you can use half, but I LOVE avocado so I used the whole thing!)
1 green onion
a handful of cilantro
1/2 of a lemon OR lime
a drizzle of balsamic vinaigrette.
salt & pepper to taste
a sprinkle of walnut pieces (this is a key ingredient!)

Chop all of the veggies into bite-sized pieces and toss in a small mixing bowl, except the avocado. When all of the other veggies are mixed together, THEN you can add the avocado, tossing gently. The avocado is so delicate that it could break down if it's mixed to hard. Salt & pepper the veggies to taste. Squeeze the lemon and drizzle some balsamic vinaigrette dressing on top and toss one more time. Pour the salad into your serving bowl and top with walnut pieces. Walnuts are rich in fiber and omega-3 fatty acids. Not only are the health benefits awesome, but they pair perfectly with the creamy texture of the avocado. Divine!

This was enough for me to eat with a small portion of dinner because it's so rich with flavor, however, this would be enough for two people to enjoy!

Just look at how beautiful this is!! ♥

Sunday, July 10, 2011

Must-Have Bags!


I was able to get these reusable produce bags for next to nothing when SaveMore.com was having a deal. I bought a voucher that was good for $20 worth of reusable bags by Esse (essereusablebags.com), for $8. When I signed up for SaveMore, I got a $10 credit so my purchase was FREE! (I just had to pay shipping for the bags) Normally, each pouch of produce bags are $11.95. After using the bags several times, I believe they are well worth the $12. It was so nice that I got a great deal, but I love them so much that I would have paid full price for them! I'm even thinking about buying more as gifts.

I decided to purchase produce bags because I have a plethora of everyday reusable bags and I had never seen reusable produce bags before!

What a find!!


We went to the farmers market on Saturday with one big reusable bag and one of our pouches of produce bags. We were able to get all of our produce and other items in all of our produce bags that conveniently fit in the one big reusable bag. All of our purchases were separate and it was nice not having a pile of plastic produce bags from all of the vendors.

Each package of six bags comes in a cute pouch with a carabiner clip attached (which makes it SO convenient to clip onto other reusable bags, purses, backpacks, etc.) The produce bags are 11" x 14" and are made of washable nylon mesh.

I'm posting about these bags because I REALLY like them! If you buy a lot of produce and go through a ton of produce bags, I highly recommend these! They are washable and come with a draw string for easy closure; I love that feature! 

Strawberry, Banana & Almond Butter Muffins


This recipe is adapted from OhSheGlows.com.

Daniel bought me a HUGE container of fresh strawberries, and I was able to find so may different ways to enjoy them. One way I decided to use them was to make some yummy muffins. We had some rip bananas too, so this was a perfect plan!

Gather:

1 cup whole grain flour
3/4 cup white flour
1/4 tsp sea salt
1/2 tsp ground cinnamon
1/2 cup brown sugar
1 tsp. baking soda
1/2 tsp. baking powder
1.5 tbsp. ground chia seed (or flax seed)  + 1/4 cup water
1.25 cup almond milk
2 heaping tbsp. coconut oil
3 tbsp. almond butter (or any other nut butter!)
2 tbsp. pure maple syrup
1 large banana mashed, left a bit chunky
3/4 cup strawberries chopped
1/2 cup sweetened coconut flakes (optional)

Directions:

Preheat your oven to 375 ͦ.


Grease your muffin tin and set it aside. I used individual silicone muffin cups. I set them on a baking pan and sprayed them as a whole; they worked great! next, in a small bowl, mix the ground chia or flax seeds and water and set is aside. In a large bowl mix all of the dry ingredients (flours, salt, cinnamon, brown sugar, baking soda & baking powder.) Set aside. In a medium sized bowl, mix all of the wet ingredients (chia seed mixture, milk, warmed coconut oil, nut butter & maple syrup). Mix well.  Add wet ingredients to dry and stir. Next, add the banana. Remember to leave it chunky. I picked of pieces with my hands to ensure good, solid pieces. :) Fold in chopped strawberries, reserving 1/4 of them to sprinkle on top of muffins. Scoop mixture into muffin tin  and sprinkle remaining strawberries and coconut flakes.  Bake them for 25 minutes. I was able to make 12 perfect sized muffins.

Dry ingredients:


Wet ingredients:


Tuesday, June 28, 2011

A Quick Fix

My wonderful husband built some shelves in my craft room closet for me to store our candles, books, decorative dishes, workout stuff, etc.I had some left over shelf liner from the kitchen and decided to put it to good use.


On the shelves that were holding smaller or fragile items, I cut the liner to fit and placed it on the shelf. This way, the unevenness of the small cracks would not make the items unbalanced or fall over.


All of my flat or bigger items are fine, I was just worried about the more unstable things. This solution works perfectly! ♥


Jamba Who..?

After doing some yoga the other day, I decided to make Daniel and I a smoothie. He had been working in the backyard for a while and I wanted him to be refreshed. :) I looked around my counter and in my fridge for some delicious ingredients, and this is what I came up with:

1 tomato
1 pink grapefruit
2 nectarines
1 Fuji apple
1 banana
&
A handful of baby carrots

There was no need for any added liquid because of the juices in the fruits.
One simple "purée" button later, and refreshment was one sip away!


The verdict: Daniel was a little taken back by the zing of the grapefruit. It did NOT help that most of my ingredients were not cold, so the smoothie was kind of room temperature. I stuck them in the fridge, and a few hours later they tasted MUCH better. I suggest that  you make your smoothie with cold fruits and veggies (maybe place them in the fridge the night before you want to make a smoothie, if you don't store them there already). I didn't think about that before; my eyes were just on the prize! :)

Garlic Mashed Potatoes

I don't think that I've shared how much I love garlic.

I love the way it smells.
I love the way it looks.
I love the many available varieties.
&
I love the way it makes just about anything taste 100% better.

I do NOT, however, like that my husband refuses to be near me when I've had too much. He also feels the need to tell me just how bad I smell. I give him props for not sugar-coating the truth. He likes garlic too, but not to my extreme.

I'm sorry I smell like a dragon babe, but it's SO worth it!

Anyway, Daniel made ribs the other night and we had some russet potatoes on the counter. I can't remember the last time I made mashed potatoes from scratch, but it's really easy and they sounded delicious!

I started by washing and peeling 3 potatoes.
Next, gather the rest of the ingredients:
2 Tbsp  Earth Balance butter
salt & pepper to taste
3/4 cup almond milk (or regular milk...we are just almond milk people)
And of course....MY SECRET WEAPON!:

I had a hard time messing with this pristine butter!
Chop the peeled potatoes into 1-inch cubes and place them in a pot of boiling water. Let them sit for a good 10 minutes, or until you can easily poke them with a fork.
Next, carefully drain the potatoes over the sink then put them back into the pot. Add all of the ingredients ad mash/stir everything together. Feel free to add more milk or butter.
Since Daniel only wanted salt & pepper in his potatoes, I scooped out a serving for me and added a hefty teaspoon of crushed garlic. You can add the garlic to the pot if you want ALL of the potatoes to have garlic. Garlic salt or garlic powder would add great flavor too, if you don't want fresh garlic.
Creamy+Garlicky+Warm=Y.U.M.♥


Wednesday, June 22, 2011

A Hint of Mint

I have a mint plant growing in an old ceramic pitcher that my dad made. The pitcher sits on my kitchen window sill and gathers so much beautiful sunshine! Looking at the mint plant every morning makes me smile. :]


I decided to put it to good use one morning so I incorporated it into my breakfast. I chopped up one banana and added a handful of raspberries and blueberries to my bowl. I topped it off with a sprig of mint (which I finely chopped after the picture), and it was so delicious! 
God sure does at a great job creating such beautiful things!

Pretty New Things!!

My  beloved spatula was chewed up by my food processor not long ago, and I  have been without one ever since. I was walking through T.J. Maxx yesterday and found this one:

It has a really sturdy, bamboo handle and a think, durable rubber base. Pretty!! 
 I  also received these as a birthday gift.
These measuring spoons are SO pretty and really detailed!

Thursday, June 16, 2011

"Maggie's Meals &.....Magnets"

Oh, my husband is so clever. :)


My mother-in-law gave me some old spice tins from her pantry after I showed interest in their vintage look. I grabbed some "Button Magnets" at Walmart (found in the craft section) and stuck them to the back of each tin. The magnets were "peel & stick" which made is SO convenient!

Instant fridge magnets!


Thursday, June 2, 2011

Balancing Act

Whether you are watching your favorite TV show, reading, or doing work on the computer, try sitting on a yoga ball instead of spending time on the couch or an office chair! This is a great way to help with your balance and strengthen muscles without breaking a sweat! Why waste valuable workout time?

àß

 Try one or all of these exercises:

*Keeping your feet firmly on the ground, gently bounce up and down on your yoga ball. With every pulse, relax your upper body and engage your hips, butt, and core muscles. (Make sure to keep your back nice and straight for all of these exercises. Don't slouch.)

* Swing your hips to the left and right slowly and with precision, all while keeping the top half of your body still and relaxed (remember, you might be typing or holding a book through all of this!).

*Do the same swinging motions, but from front to back. Keep your shoulders relaxed and you core tight as you press your hips forward then back.

*Sit on the yoga ball upright and keep your top half still while you rotate your hips on the ball in a circular motion. Rotate 10 times clockwise then switch to counter clockwise. It's seriously the easiest workout! (I'm doing it as I'm writing this!)

Also, remember to keep your water bottle filled and close by!! :)


Stay hydrated and enjoy the AMAZING benefits of a yoga ball!!

♥

Wednesday, June 1, 2011

Peanut Butter, Jam & Banana Breakfast Pizza

This recipe is slightly adapted from OhSheGlows.com.

You will need:

2 cups of whole wheat flour
1/2 cup Earth Balance Butter, warmed
1/4 cup brown sugar
1 large banana
1/2 cup Almond Milk
1 tsp cinnamon
1/4 tsp sea salt
3/4 cup jam (I used strawberry)
1/2 cup peanut butter
shredded coconut to garnish (optional)

Preheat your oven to 400° and grease a pie plate, set it to the side for now. In a large bowl, mix together the whole wheat flour, brown sugar, salt and cinnamon. Next, add the almond milk and warmed Earth Balance and mix well. Spread the batter in the pie plate; use your fingers to press it evenly. Spread the jam on the crust and add banana slices.  I sprinkled some shredded coconut on top of mine. Once you have all of your toppings, pop the pizza in the oven for 25 minutes. Remove and cool for 15 minutes. Pipe on the peanut butter and you are ready to serve! You can eat it warm or chill it and serve it cold.

(I had another slice the next morning from the fridge and it was delicious cold!)

Ready to go in the oven!
 
Right out of the oven. Smells amazing!!
Put the peanut butter in a snack size plastic baggie and cut one of the corners. This will ensure that your piping is perfect!
Feel free to add other toppings once its out of the oven! Chocolate chips, nuts, raisins, or dried cranberries. You can really add anything.

Friday, May 27, 2011

D'anjou; what a view!

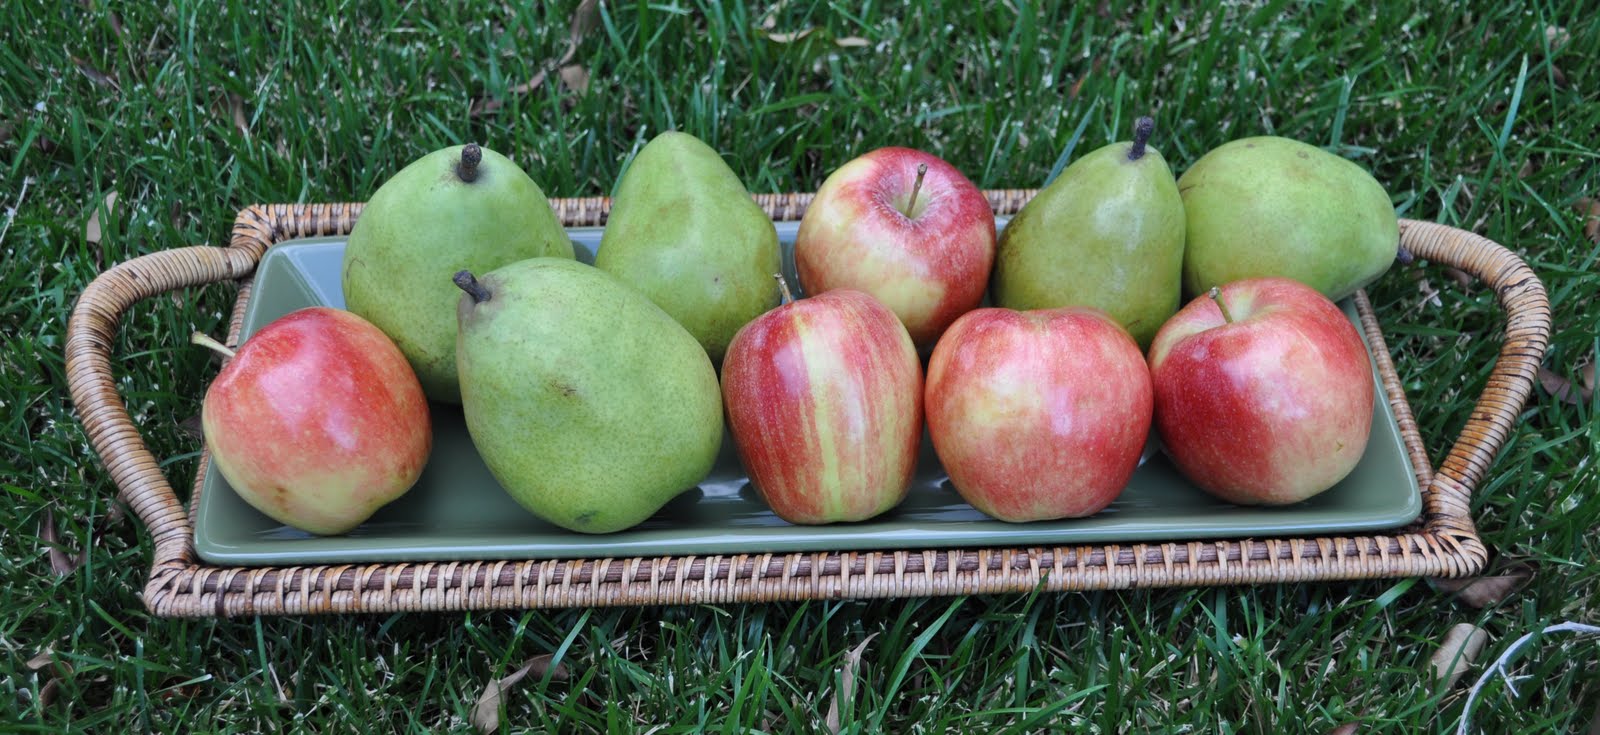
While grocery shopping the other day, I passed by some D'anjou pears and was stopped in my tracks.; they looked so delightful! I gathered some Fuji apples too and arranged them on my favorite Pampered Chef tray. They brighten up my kitchen!

Pretty. ♥