Monday, March 14, 2011

Classic Turkey Meatballs

These meatballs have tons of flavor and are very versatile. I served them with the Basmati Rice Medley from Trader Joe's, but they could work with just about anything!

Ingredients:
1 pound ground turkey
1 cup minced onions
1 cup chopped mushrooms
1 cup breadcrumbs
1/4 cup Worcestershire sauce
1 T minced garlic
a few pinches each of salt and pepper
Start by sauteing the onions and mushrooms until they are soft.
Set the mushrooms and onions with the other ingredients to slightly cool, then begin to add all the ingredients to the turkey. The order of ingredients doesn't matter, but add them slowly while continuing to mix. You don't want big clumps of onions or breadcrumbs in the mixture. I mix with my hands; it's messy, but efficient. Once you have all of the ingredients evenly mixed, use a cookie dough scoop to grab pieces of the mixture and arrange the meatballs on a greased piece of foil  placed on a cookie sheet.
Bake them at 350° for about 25 minutes. Cut one in half to make sure they are fully cooked. Enjoy!!

Tuesday, March 1, 2011

My Funny Husband

"You should take a picture of the sink and post that on your blog....you could call it Maggie's Meals and Messes" ♥

3 Cheese & Salami Pizza

I love making pizza from scratch! I made a three cheese pizza tonight and took beautiful pictures to post. Unfortunately, I forgot to put salt in the dough, and the consistency was a little off. The flavors were fabulous, but I'll try again some other night. Here's the recipe, just remember to add the salt! :) 

Pizza Dough Ingredients:

3 1/2 cups of flour
9 ounces of tepid water
3/4 teaspoon active dry yeast
1 1/2 teaspoon fine sea salt
2 tablespoon extra virgin olive oil
1 tablespoon minced garlic (Optional)
A palmful of Dry Oregano (Optional)
A palmful of Dry Basil (Optional)

The first time I tried this recipe I did not add the last three ingredients. I have since tried them and realized that they add great flavor to the dough!

If you have a standing mixer:
Combine the ingredients in the bowl fitted with the paddle and mix low until the mixture come together. Switch to the dough hook and continue mixing medium-low another 3-4 minutes. Check dough-if it's too dry, add a bit more water. If it's too sticky, add a bit for flour. Go to step 2.

If you do not have a standing mixer:
Combine the ingredients in a bowl and start to mix ingredients with a wooden spoon, then start to knead the dough against the bowl with your hands. Check dough-if it's too dry, add a bit more water. If it's too sticky, add a bit for flour.

2. Dump dough onto lightly floured board and continue to knead until the dough is smooth and elastic, about 5-7 minutes.  Form dough into a ball and place in a lightly greased bowl, turn to coat, and cover with plastic wrap. Let rest for 1/2 hour to 45 minutes until risen.

3. Turn dough out onto a lightly floured board and press down to deflate. If you don't want to make a big pizza, cut the dough into thirds (or desired portions), form into balls and place on a lightly floured tray, covered with oiled plastic wrap. Store the dough in the fridge overnight and allow it to sit at room temperature 10-15 minutes before shaping/baking. I usually use all of the dough because it makes a great sized pizza.

Pizza toppings: (All can be found at Trader Joe's)
A chunk of Fontina Cheese*
A chunk of Mozzarella Cheese*
A chunk of Pecorino Romano Cheese*
Tomato Basil Sauce
Reduced Sodium Salami Slices, cut in half
Dry Oregano
Dry Basil
 
Preheat your oven to 500°. If you have a pizza stone, place you stone in the oven to preheat while you are shredding your cheese. Shred the cheeses over a mixing bowl so that they are easy to blend when you are done. Set the cheese aside and begin to form the dough into a round.
Place the dough on the stone and start to build your pizza!(I brush a little olive oil on my stone first, you might not have to depending on how seasoned your stone is). Spoonful sauce onto the dough and spread evenly. Next, layer the salami slices around and top with the cheese mixture. Add a dash of both dry seasonings for extra flavor!
Bake for 10-15 minutes or until cheese is golden. Let the pizza rest for a bit before slicing.

Let me know if you have any questions! This was a pretty lengthy recipe :)

*I didn't specify cheese measurements because you can just put as much you like! However, less is sometimes more because it might weigh down the pizza or too much cheese might leave grease on top.

Monday, February 28, 2011

Flipped Tips

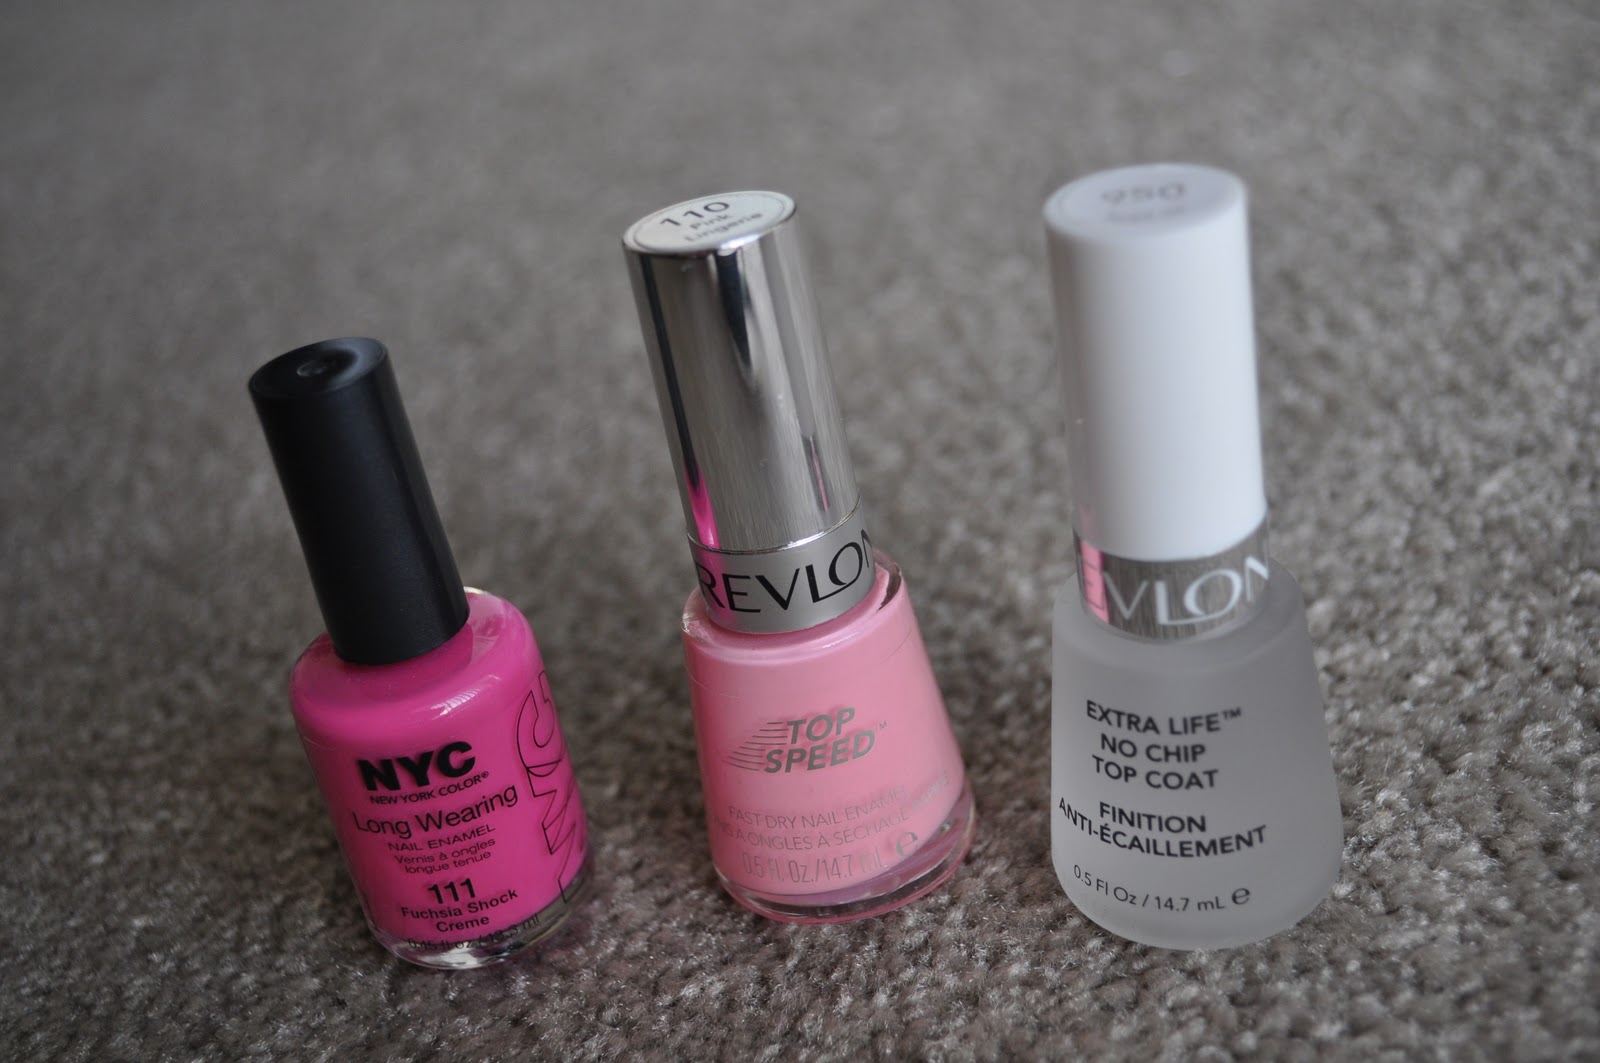
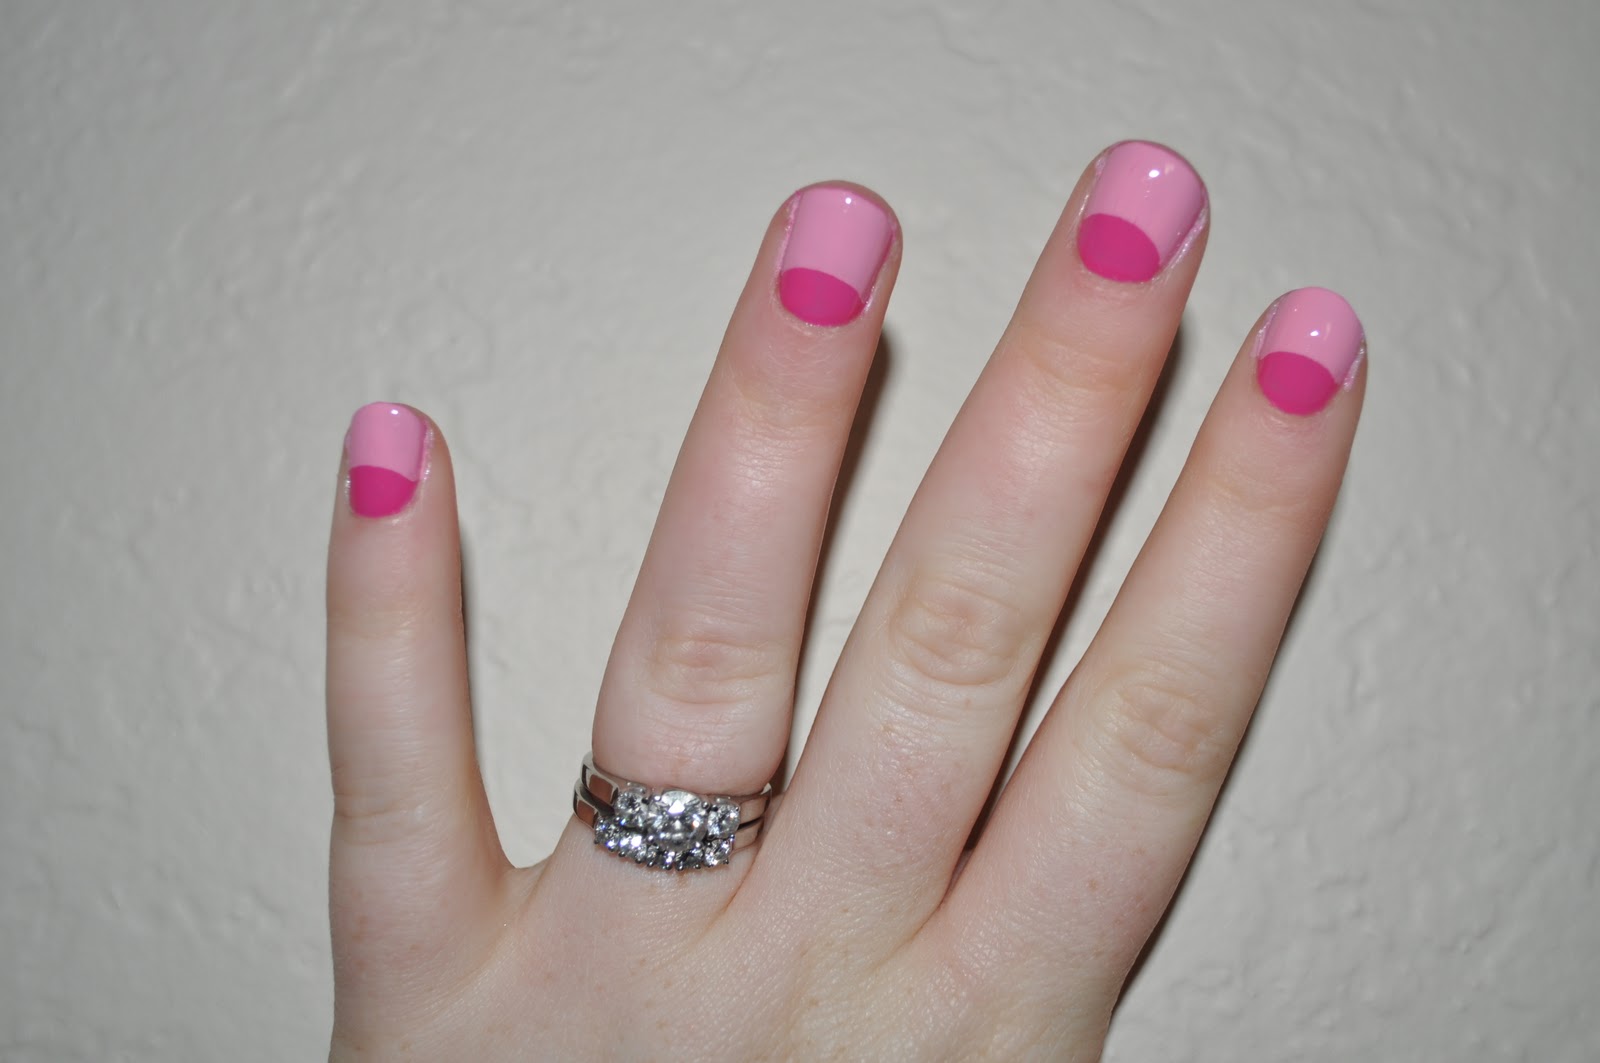
This is a super fun way to change up your nail polish routine! You'll need two colors of nail polish, a clear top coat, and hole punch reinforcement stickers. I chose Fuchsia Shock Creme by NYC, Pink Lingerie by Revlon, and Extra Life No Chip Top Coat by Revlon. Don't rush this project! Pop in a movie and take your time to get it just right. It's worth the wait!
First, paint your nails with the color you want for the base of your nails.
Wait until your nails are compleatly dry before placing the stickers on them. I found that the NYC nail polish dries quickly. Once you have the stickers in position, paint on your top coat; two coats should make it perfect.
The Revlon polish takes a little longer to dry so just be really patient and keep the stickers on for a while. When you are ready, carefully peel off the stickers and brush on the clear top coat.
You can use ANY colors for this! If you use a soft white for the base color and a light pink (like Pink Lingerie) for the top, it makes for a great flipped French tip look.

Ceramic Light Centerpiece

I have a few ceramic mugs and small pitchers that my Dad made in the 70's that I use for decoration because of their unique and rustic flare. I gathered three of them to make this centerpiece. You can use any wide-mouth vase, mug or bowl. If you don't have any dishes to choose from, go to your local thrift store, they might have a selection of vintage pieces that are different and fun.  For this centerpiece, you will need your choice of dishware, an LED puck, and a bag of glass gems that can be found in the craft or candle section at Target or Walmart.
Set the LED puck inside the mug than cover with the gems. Depending on the depth of the mug or bowl, place gems in the container first so that the LED puck is toward the top.

This centerpiece is pretty night or day! You can also put them on side tables or up the sides of a staircase for decoration or extra light. Just press the puck ON through the gems.  

Sunday, February 27, 2011

A Breakfast for the Birds

This is one of my favorite things to eat for breakfast! I like a good crunch, and this breakfast packs a big crunch and is rich in essential nutrients.


Ingredients: (All except the Poppy Seeds can be found at Trader Joe's)
2 slices of whole grain bread (Sprouted Whole Grain is my favorite)
Sunflower Seed Butter
Organic Blue Agave Sweetener (Sweet like honey but thinner and easier to work with)
Pepitas, roasted & salted (A variety of Pumpkin Seeds)
Sunflower Seeds, roasted & unsalted
Flax Seeds
Sesame Seeds
Poppy Seeds


Start by toasting the bread to your liking.
Spread on a layer of Sunflower Seed Butter.
Next, sprinkle on the Pepitas, Sunflower Seeds,
and Flax Seeds. Drizzle on the Agave Sweetener then
top in off with the Sesame and Poppy Seeds.
Enjoy by themselves or with a grapefruit or Fage Greek Yogurt, my favorite! :)

Saturday, February 26, 2011

Cream Cheese Wontons with a Twist

I did a little experiment the other night when my good friends Anna and Travis came over for dinner. I wanted to serve cream cheese wontons with my Asian chicken salad (I'll post that recipe soon :), but didn't have any wonton wrappers. However I did have puff pastry in my freezer, as I always do. They turned out yummy and fluffy with a little crunch. Who needs wonton wrappers?! :)

Start by defrosting two pastry sheets and cut them into nine pieces. 
Then stir together two 8-ounce blocks of softened cream cheese. (Set the cream cheese on the counter a few hours before you start cooking.) To the cream cheese, add one tablespoon of garlic powder, a half tablespoon of minced garlic, and two sticks of green onion.
                              
Next, carefully stretch out each square and fill them with the cream cheese mixture. Bring all of the corners up and press the edges tight. In order to "glue" the pastry to itself,  beat an egg and coat the edges of the squares before pinching the corners together. Brush the wontons with more egg then bake them on a greased piece of foil at 350° for about 25 minutes or until they are puffed up and golden.
WARNING! Make sure you have enough egg on the edges of the squares and be sure to press them together really well. A few of my wontons broke and cream cheese spilled out. They still tasted delicious, but they were not pretty :)


This recipe was for 18 squares or two pastry sheets. You can always cut the recipe in half for one pastry sheets worth.


Anna and I decided that the cream cheese mixture also makes a great spread for crackers! :)

Jewelry Storage

I recently rearranged my jewelry and I thought of a few different ways to store and display my pieces. 


I bought a large mug and spoon rest with flare to look pretty on my shelf. I store my little pieces in the spoon rest and my chunky bangles and large pieces in the mug. Go through your cupboards and find kitchen items that you don't really use! (cups, trays, utensil organizers, etc.)
Also, I hang my earrings on a scarf that is fed through a wood hanger. I chose a scarf that I rarely wear, fed it through the wood hanger, and tied a knot at the end. Make sure you pierce both layers of scarf when you poke the earring through.

Monday, November 15, 2010

Drab to Fab!

I wanted to give my friend Travis some toffee covered almonds as a "just because" present but didn't want to just throw them in a Ziploc bag. Instead, I filled an old salsa jar with the almonds and added a few simple touches that really made it unique!


You can give away old jars filled with just about anything! *nuts, trail mix, dried fruit, soup mix, candy, peanut butter pretzels, spices, flavored popcorn, marinades, and homemade relishes, jams, or  sauces.*


I started with an old jar, the almonds, a square piece of material about two inches larger than the lid of the jar, and a matching hair band.
Fill the jar with whatever you want, screw on the lid, then cover with the material and secure with the hairband. I added a personalized tag with double sided tape.

5 Ingredient Dinner!

BBQ Turkey Cups:
These cups are simple to make and are full of flavor. All you need are these five ingredients: ground turkey, Pillsbury Grands Biscuits, shredded cheese, BBQ sauce, and brown sugar.
Spray a cupcake pan with non-stick spray. Carefully stretch the biscuit dough with your hands and form them to the cupcake pan.  
                                       
Cook the package of ground turkey and drain out any fat/liquid. Mix the cooked turkey with one cup of BBQ sauce, two tablespoons of brown sugar, and a handful of shredded cheese. Scoop the mixture into the cups and top with more cheese. You might have a couple scoops of mixture left over depending on how full you pack your cups (I stuff mine :)  Bake for about 20 minutes until the dough puffs up and the cheese is melted.

Easy Caprese

This is a super easy side that pairs perfectly with just about anything. We hosted dinner the other night for our good friends and I wanted to serve a salad but forgot that we had no lettuce. Instead, I sliced two tomatoes, topped them with fresh mozzarella cheese, and sprinkled them with dried basil. (Dried basil is a great substitute for fresh basil in a pinch!) I drizzled some balsamic vinaigrette on top and finished the salad with some green onions. It was so pretty and very delicious!


Thursday, November 4, 2010

Stamp Tags

Whenever I receive a letter, I tear off the corner where the stamp is and use them as tags for presents. I'm really starting to add to my collection now that the holidays are coming up. These look great if you thread twine through a tiny slit in the tag before wrapping around your present, or you can just tuck them under ribbon. Just write your "to" and "from" and a holiday message underneath the stamped area. These tags add character to your gift and really make it unique! 

Monday, November 1, 2010

Pretty Pumpkins!

These decorations can last from before Halloween through Thanksgiving! Start with three clear pumpkin-shaped glass jars and fill them with orange tissue paper. Place a flameless tealight candle in the bottom of the jar. Make sure that there is not too much tissue paper in front of the candle because the light can get lost. Keep the candle close to the front with one piece of the paper in front. During the day you can keep the lights off, then switch them on as soon as it gets dark. These are great for outdoor decorating as well.